
Oversized Panel Support
By Shannon McKinney - DT Glass, Inc.
In our blog what makes a frameless shower frameless, we talk about 3/8” and 1/2” glass being thick enough to support itself without having to wrap it in metal. While that statement is generally true, it doesn’t apply at the extremes.
Consider any building material whether it’s plywood, sheetrock, or steel, and you’ll recognize that a square footage or length of material can’t cover an unlimited distance. There’s a point where any material, no matter how strong, needs additional support. Heavy glass is no exception.
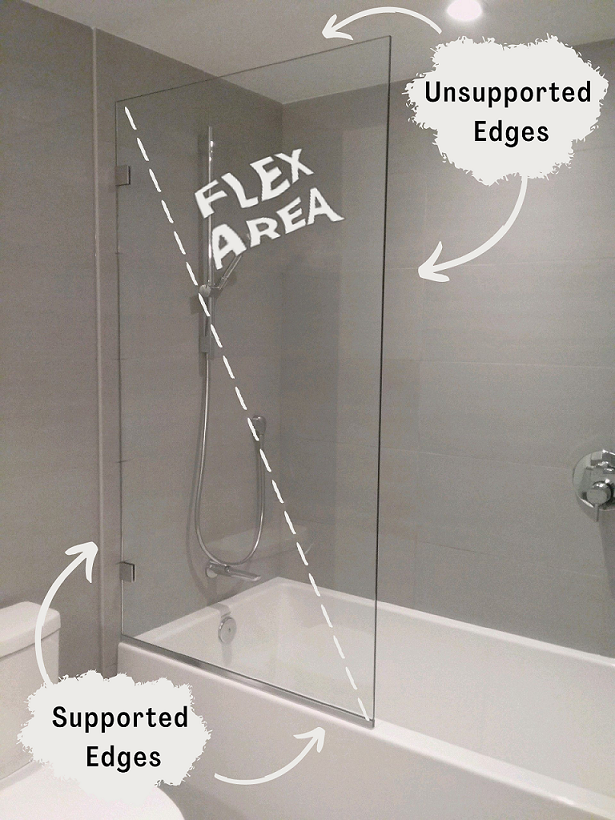
Glass Deflection – Most people think of glass as a stiff and solid material that would break if it bent. However, it really has quite a bit of flexibility, and the larger the panel, the more noticeable the flex. Within reason, it’s fine for glass to flex, but it can still be unnerving for the shower user. We identify oversized panels and add support so that homeowners can not only feel safe, but also comfortable.

When adding support to an oversized panel, it doesn’t help to add strength to the wall or the curb where the panel is already well attached. The area that needs support is the outer corner of the glass. There are four ways to accomplish this:
Support Bar
Metal Header
Glass Transom
Panel to the Ceiling
Support Bar – This is usually one of the least desirable options, not only because the bar is unsightly, but also because we want the bar to attach horizontally to the back wall. The concept that first comes to mind is to attach the bar vertically to the ceiling, but this method creates a lever that will work its way loose over time.
With advance planning, we can try to avoid the need for an oversized panel in the first place.
Metal Header – A metal header sitting over the top of the panel and secured from wall-to-wall offers fantastic support for the panel and creates additional design options for positioning the door.
Glass Transom – Using glass to connect a panel to the wall keeps the visual of an all-glass look. Simply increase the height of the door to keep the tallest shower user from having to duck.
Panel to the Ceiling – Attaching the panel to the ceiling requires secure framing in the ceiling, so this option isn’t always available without advance planning. But once backing is in place, a panel that spans from floor to ceiling will be very secure. Panel to Ceiling Caution: this option requires adequate ventilation to keep the steam from collecting at the ceiling and causing mold. Avoid creating an accidental steam shower!

Let’s throw in a couple of other options that are available at the initial design stage. With advance planning, when anything is possible, we can look at avoiding the need for an oversized panel in the first place. Try asking:
“Can we build out a framed section of wall so that the glass doesn’t need to span as much distance?”
“Can we create a framed and tiled post at the edge of the panel?”
“If the door is wider, the panel can be narrower. Can we make space for a wider door to swing into the room?”
We love working with our customers at the planning stages to identify all the options. It’s possible to combine beauty, functionality, and safety to create our homeowner’s dream shower. Call us to schedule a consultation, whether it’s by phone, email, on-site, or in our showroom.